Where we ended was sewing together the blocks to make a top.

The next part is very important. You must square up your top. I will warn you this can be frustrating if your seams are off a little. What I do is the best I can. I pick a seam that seams to be straight and measure off of there. (If you click on the picture you can see where I tried to measure from by the red arrows.) This is important if you are using a border. Basically you want to make each side is even. I will warn you my seams weren't always exact and some of my blocks look off. I tried to repair one before I squared it up.

You with me so far? LOL.
I decided I wanted a border. So I ran to my local fabric store and proceeded to be overwhelmed. I couldn't find what I wanted to use. sigh... I took my quilt top with me of course so that I could lay it next to anything I found to see if it tickled my fancy. Originally I thought I wanted two borders, but finally decided on one border. I had my crap er um quilt top thrown on the cutting table with the fabric next to it. I kept walking around it and stalking it to make sure I liked it. I looked at the sales lady and asked her thoughts. Then I couldn't decide if it was black or blue. So the lady went over grabbed some black fabric and laid it next to it. Uh that didn't help. It still looked black. I was hoping for blue. They had used the fabric in a display quilt and it looked blue. GRRRRR... now what??? I said to heck with it and bought it. Then the tough question... how much do you need??? UGGGHHH I forgot to measure it DOH!!!!!! Ummmmmmm well uhhhh I uhhh don't know. She just smiled and proceeded to measure it for me. What a nice lady!!!! So for you
I will show you what I should have done prior to buying my border fabric. I guess I didn't take a picture on how to measure your quilt top. Soooo...
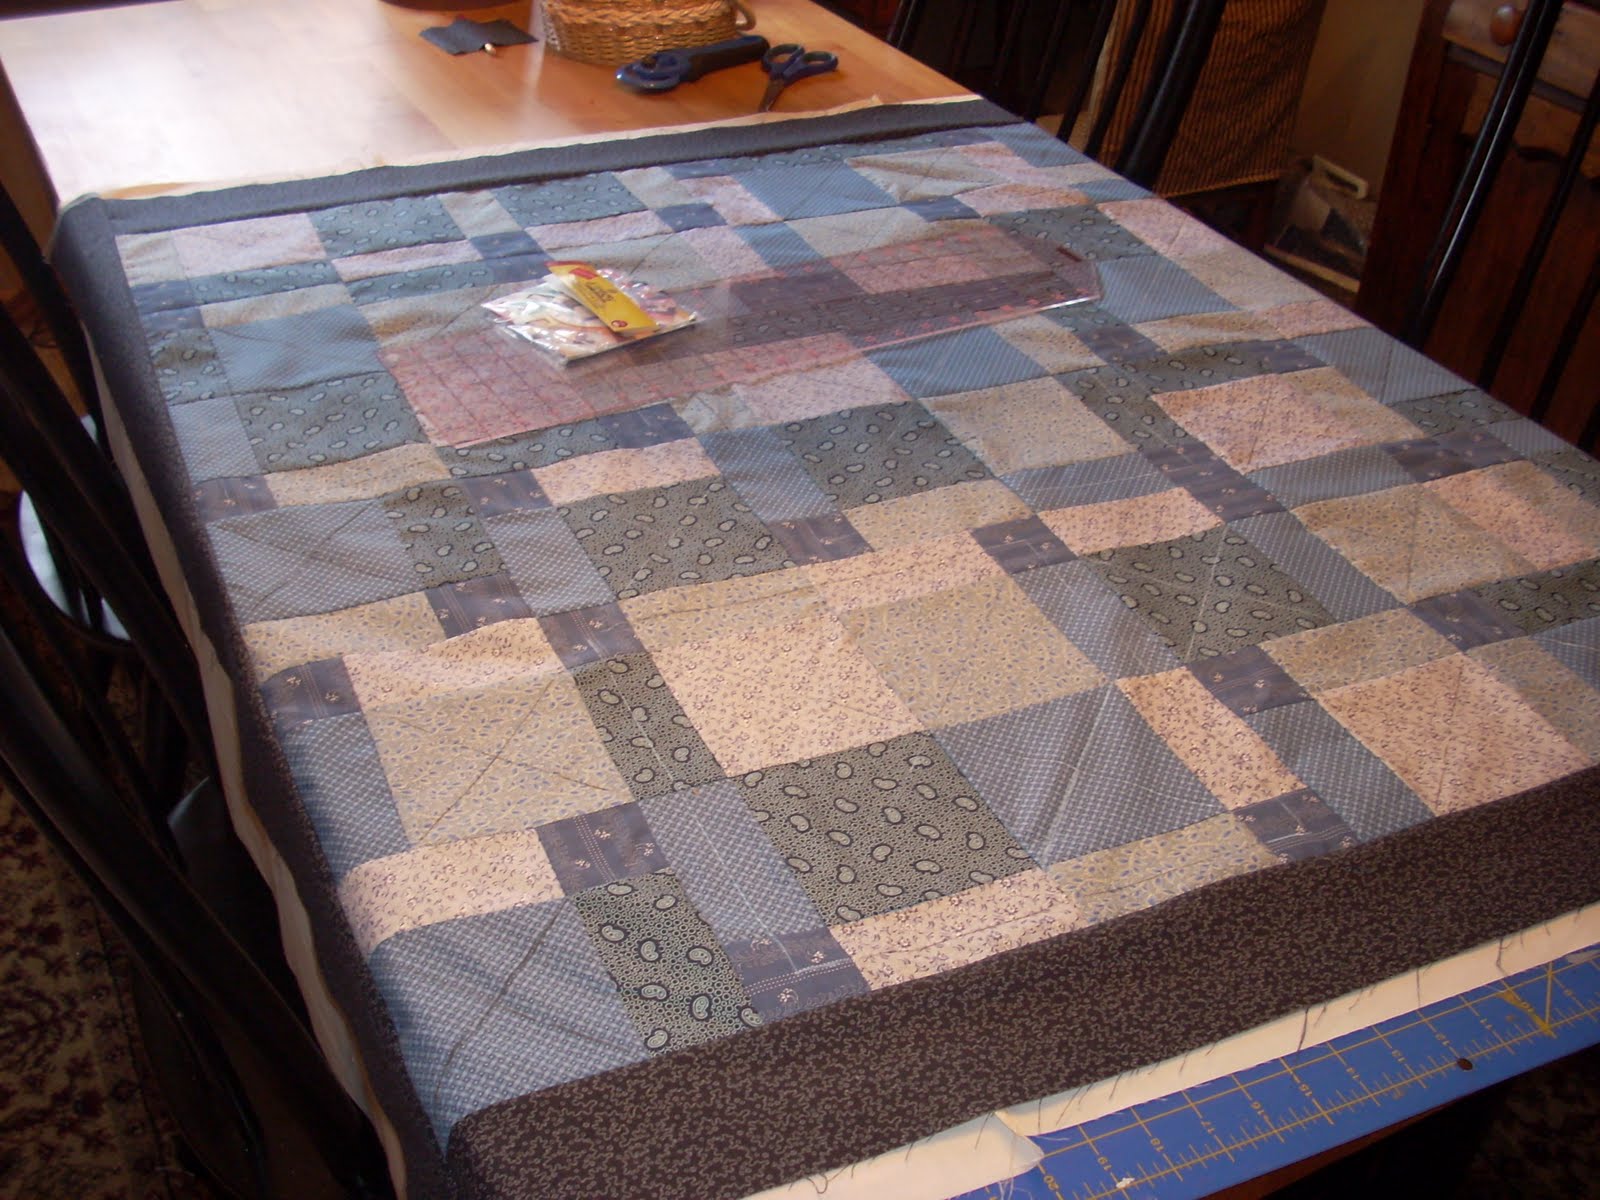
When measuring your quilt measure your seams in the middle of your quilt. There should be one down the middle vertically and one horizontally. These are your most accurate seams. The further away you go the more distorted the seams become. Mine measured like 38 1/2 inches or something close to that.

So I decided I wanted a 3 in. border and that I would bind my quilt with the same fabric. That'll look good right? So I told the nice lady what I wanted and she helped me decide I needed 7/8 of a yard. So I told her give me a yard just in case. Listen to me carefully... If I were you I'd go a tad smaller border here's why. When you cut your border add 1/2 in. to the measurement. So I would need to cut my strips 3 1/2 in. so that I have 1/4 in seam allowances. Ok... so I squared off one of my edges to be sure I had a straight side....

I cut two strips of 3 1/2 in fabric the length of the fabric which is normally 43 to 44 inches wide. I then took one of the measurements (normally your vertical measurement) and cut the strips to match. Sew those two strips on the sides of your quilt top. Sew then press your seams.

So now we have to cut the top and bottom strips. Remeasure your horizontal middle seams. THIS is where I screwed up!!!! The three inch border now makes it impossible to cut a length of fabric to fit these two sides. GRRRRR... The horizontal measurement I got with the borders was just a tad bigger than the width of the fabric and if I would have cut the selvage edges off it would have been to short. So I left them on and decided I may have to make my binding a tad wider to cover those edges. Anyway...
OK all sewn on. You could add another border if you'd like. I'm sticking with one.

Now you are ready to mark quilting lines. I went and bought this little pencil to mark my quilt top. I think it was maybe $1.50. An Amish lady told me NEVER to use a number 2 pencil because sometimes it doesn't come out. I found this one at the quilt shop BUT Jo-Annes has some too. My pencil was white and didn't mark well on my lighter fabric so I ended up buying 2 colors. Always mark your quilt top before layering it with your back and batting.
Alright got mine marked. Now I need to decide on a backing. Once again my quilt top measures larger than a piece of fabric so I will need to sew fabric together to make it large enough. I look in my stash and decide muslin will do the trick. I have way more than enough and even had some left over from my curtain project. I decided to use that. BUT the width measured 20 inches. So I will need to cut three pieces to fit the back. WHY you ask? Two pieces still would only measure 40 inches and that is to skinny. So three it is. Remember when cutting your backing to leave at least 2 inches of extra fabric all the way around. ANOTHER mistake on my part. I guess I couldn't add and only left an inch on the top and bottom. DUH!!! Basically take your quilt top measurements and add 4 inches to both your vertical and horizontal measurements.
My 3 pieces... I will have three seams on my backing.

Next is your batting. There are different types of batting. I have used heavy stuff and high loft stuff. The high loft is good if you are going to tie your quilt. The heavy stuff I don't recommend hand quilting it. It is very hard to do. On a recent trip to Amish country I stopped in a quilt shop and was talking with an Amish lady who told me they use Mountain Mist, which I found at Jo-Annes. This batting is 100% polyester and is only 1/8 in loft. She says it is much easier to hand quilt. I ended up buying a twin size bag because the crib quilt batting was too small. I then cut it to match my backing fabric.

So now that everything is cut you need to make a sandwich. No not that kind. LOL. Take your backing fabric lay it on a surface, wrong side up, that's big enough for you to tape down your edges to hold the backing straight. I've tried it on the carpet and it doesn't work so great. So I used my dining table. It was not big enough but I was able to deal with it. I centered my backing fabric on the table and taped it. I centered my batting on top of that. Then centered my quilt top on the top of that.
Now depending on how you are going to finish it is how you pin it together. I am handquilting mine. While at Jo-Annes the other day I decided to buy myself some bigger straight pins. These measure 1 3/4 inches. I LOVE these. It made it so much easier to pin my layers together. I have also used big safety pins and regular size straight pins. By far this method works best for me.

So I pinned my layers together being careful to try to keep my backing smooth. I have trouble doing this step. I get bubbles and it always wrinkles a little. I figure it's the back oh well. LOL. I know good attitude right?
I decided to then baste my layers together to make sure the layers don't shift while I'm quilting it. I have never done this before. I usually only safety pin it. I will have to see how this will work. I had to show you the back because you wouldn't have been able to see it on the front. I started in the middle with my vertical stitches. I tried to keep them about 4 inches apart and worked outward. I then did my horizontal the same way. I got lots of wrinkles and bubbles. Oh well. LOL

The next part of this series will take a bit as I stitch my top. I will show my progress and let you know when I will post how to do a binding. Good luck and if you have any questions let me know.
It's looking really good!!
ReplyDeleteI love how the process doesn't go exactly perfercT!!
That's how my projects seem to go--whoops I forgot this, yuck I cut this too short!!!