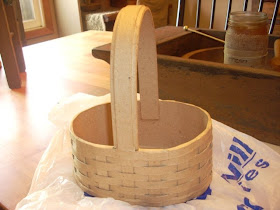
Here's the basket unpainted ready to go...

I always have a splash guard under my painting projects such as a plastic bag or a really cheap plastic shower curtain liner.
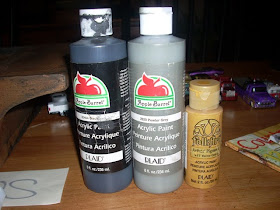
These are the colors I'm using today. Black, pewter grey, and yellow ochre. I will show you another color later on that I decided to use also.

I began by painting the entire piece black. It doesn't have to be perfect. This is the underneath coating. I like using sponge brushes the best. You can purchase them at home improvement stores or craft stores. Let this coat dry completely.

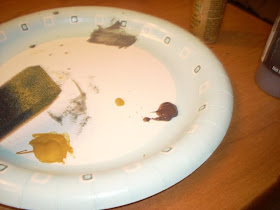
In order to add the colors on top you will need the following items. A sponge brush, a paper plate, paper towels, a cup or bowl of water, and of course colors.

Take and dip just the tip of your sponge brush in the water. Wring it out a little because you want it damp not wringing wet. Remember water and paper don't mix well. If it's too wet your project will melt in to paper pulp.

Now squeeze some paint onto your paper plate. I used the pewter grey first. Take your damp sponge and put it in the paint. Start brushing it on your item as such. See how it looks watery? Again you don't have to be perfect.

I know this is hard to see, but while your paint is still wet take your paper towel and rub in circular motion to "blend" the paint. You can see in places where all the paint was taken off. This is because we are using water and some of the paper is dissolving. This is why you don't want it soaking wet. I LIKE it when certain areas rub off. Work in small areas because the paint will dry quickly. If this happens just re dampen your sponge and run it over the drying paint and then rub with a paper towel. Dampen and add paint until your piece is done.

Alright the entire piece has been finished. Again I like some areas to rub off completely.

Are you ready to shield your eyes. These pics are horrible. I tried with and without a flash but this yellow is bright. After your grey is dry do the same technique with the yellow as you did with the grey. Water the paint down, paint, and rub with a paper towel.


After looking this basket was still way to bright for me so added another color. My trusty burnt umber. This prims everything right up!

Again squirt your paint on your paper plate. Now I used the same sponge that I used for my yellow. I don't care if the colors mix. You could use another one. I just store my sponge in a clear plastic sandwich bag and wrap it around the handle so it doesn't dry out in between coats.

Again use the same technique as above and VOILA!!!! If you find you added too much brown then take your same sponge brush and put a little yellow or grey in places that you want to lighten up. Or just add water to thin it out and rub with your paper towel.

I think this came out pretty awesome.

Thanks for the tutorial. Your finishes are so great and I'm sure many will appreciate your sharing how you do it.
ReplyDeleteHope you are doing well,
T
I have been wanting to paint & antique a wood basket & do the cracking to make it look old. Can this method you did be done on a wood basket the same way ? I have an old Longaberger basket & thought about aging it by painting. What do you think ?
ReplyDeleteMargaret,I used this technique on a wood box. I have tried to paint baskets with brushes and it is very hard to get in all the nooks and crannies. I have found spray painting is much faster and easier. However, I would try first on a really cheap Goodwill basket before trying it on your Longaberger. If you do try please email me a picture I'd LOVE to see it.
ReplyDeleteMary
Margaret,I used this technique on a wood box. I have tried to paint baskets with brushes and it is very hard to get in all the nooks and crannies. I have found spray painting is much faster and easier. However, I would try first on a really cheap Goodwill basket before trying it on your Longaberger. If you do try please email me a picture I'd LOVE to see it.
ReplyDeleteMary
Great basket!
ReplyDeleteThank you for the tutorial..The basket did come out very nice..Have a great week
ReplyDelete