Showing posts with label Tutorial. Show all posts

Thursday, December 29, 2022

Wooly Tree Tutorial... Sort Of


For those who follow me on Facebook know I finally made a wooly tree.  Oh I bought everything I needed a couple years ago in great anticipation of doing it.  BUT, I never got to it.  So, in between molding and painting my paper mache Santa's and snowmen I did it.  Is is time consuming? YES! Is it hard? Absolutely NOT!  Is it fun? Definitely!  

I got asked on Facebook to give directions on how to make them.  Well, since I have never made them before now I will post exactly what pattern I bought and what videos I used to learn.  YouTube is a wonderful thing!  There is no need for me to reinvent the wheel and I respect the ones who sell the patterns for them so I will not give out their directions.

I bought the pattern from Searsport Rug Hooking. For $5 you can make all sorts of sizes of trees.  I started with the smallest obviously.  I didn't want to waste wool if I screwed up.  Next, I followed the YouTube videos from Two Old Crows.  I believe they too have a pattern/kit, but I can't say for sure since the video was done awhile ago.  I mainly bought the pattern so I had measurements for the branches.  I could have read the directions, but I am a visual learner.  I have to see it to do it.  I watched multiple videos of different people and found these ones most helpful.

So, enjoy.  Happy tree making.  

P.S. I plan on making a couple more to add to my collection.


EDIT...


There was a question as to what kind of scissors I used.  I just used my trusty old Fiskar scissors.  The trick is to be sure that the tips of them are sharp.  If your kids or hubby used them to cut paper then you might need to sharpen them or use something else. 
 
Pin It

Monday, September 21, 2020

Burlap Shade Tutorial


For several weeks I have been thinking about making some shades for my front windows. I LOVE the look of burlap, but after reading several articles about sewing burlap I was scared.  So, I started to research burlap look fabric, linen, and polyester fabrics that would give me the look but cheaper on the wallet.  Well, I didn't find any of those options that would fit my budget.  I then looked at different weaves of burlap because it is what I wanted after all.  There was a tight weave and then a much more open weave.  The tighter weave may be easier to sew, but then would it block to much light? It basically came down to price and what I'd be able to find at the store since Covid has really slowed down the shipment of non-necessities as I found out today.  More on that later.  Don't get me wrong I could just as easy sit here and order online, but again I'm to cheap to pay shipping. Then I began to wonder if I might be able to not sew them and then I wouldn't have to worry about the burlap unraveling. Hmmm... that was another conversation inside my head and also with a lady at work.  I will show you later why sewing them worked best for me.

I happened to have time to visit a thrift store the other day.  Remember that I live on the outskirts of Amish Country in Ohio.  Our thrift stores are much different then Goodwill or Salvation Army.  This particular one is Amish owned and run with all proceeds going to a battered women's shelter. Anyway,  I happened to be in the fabric department and saw this.


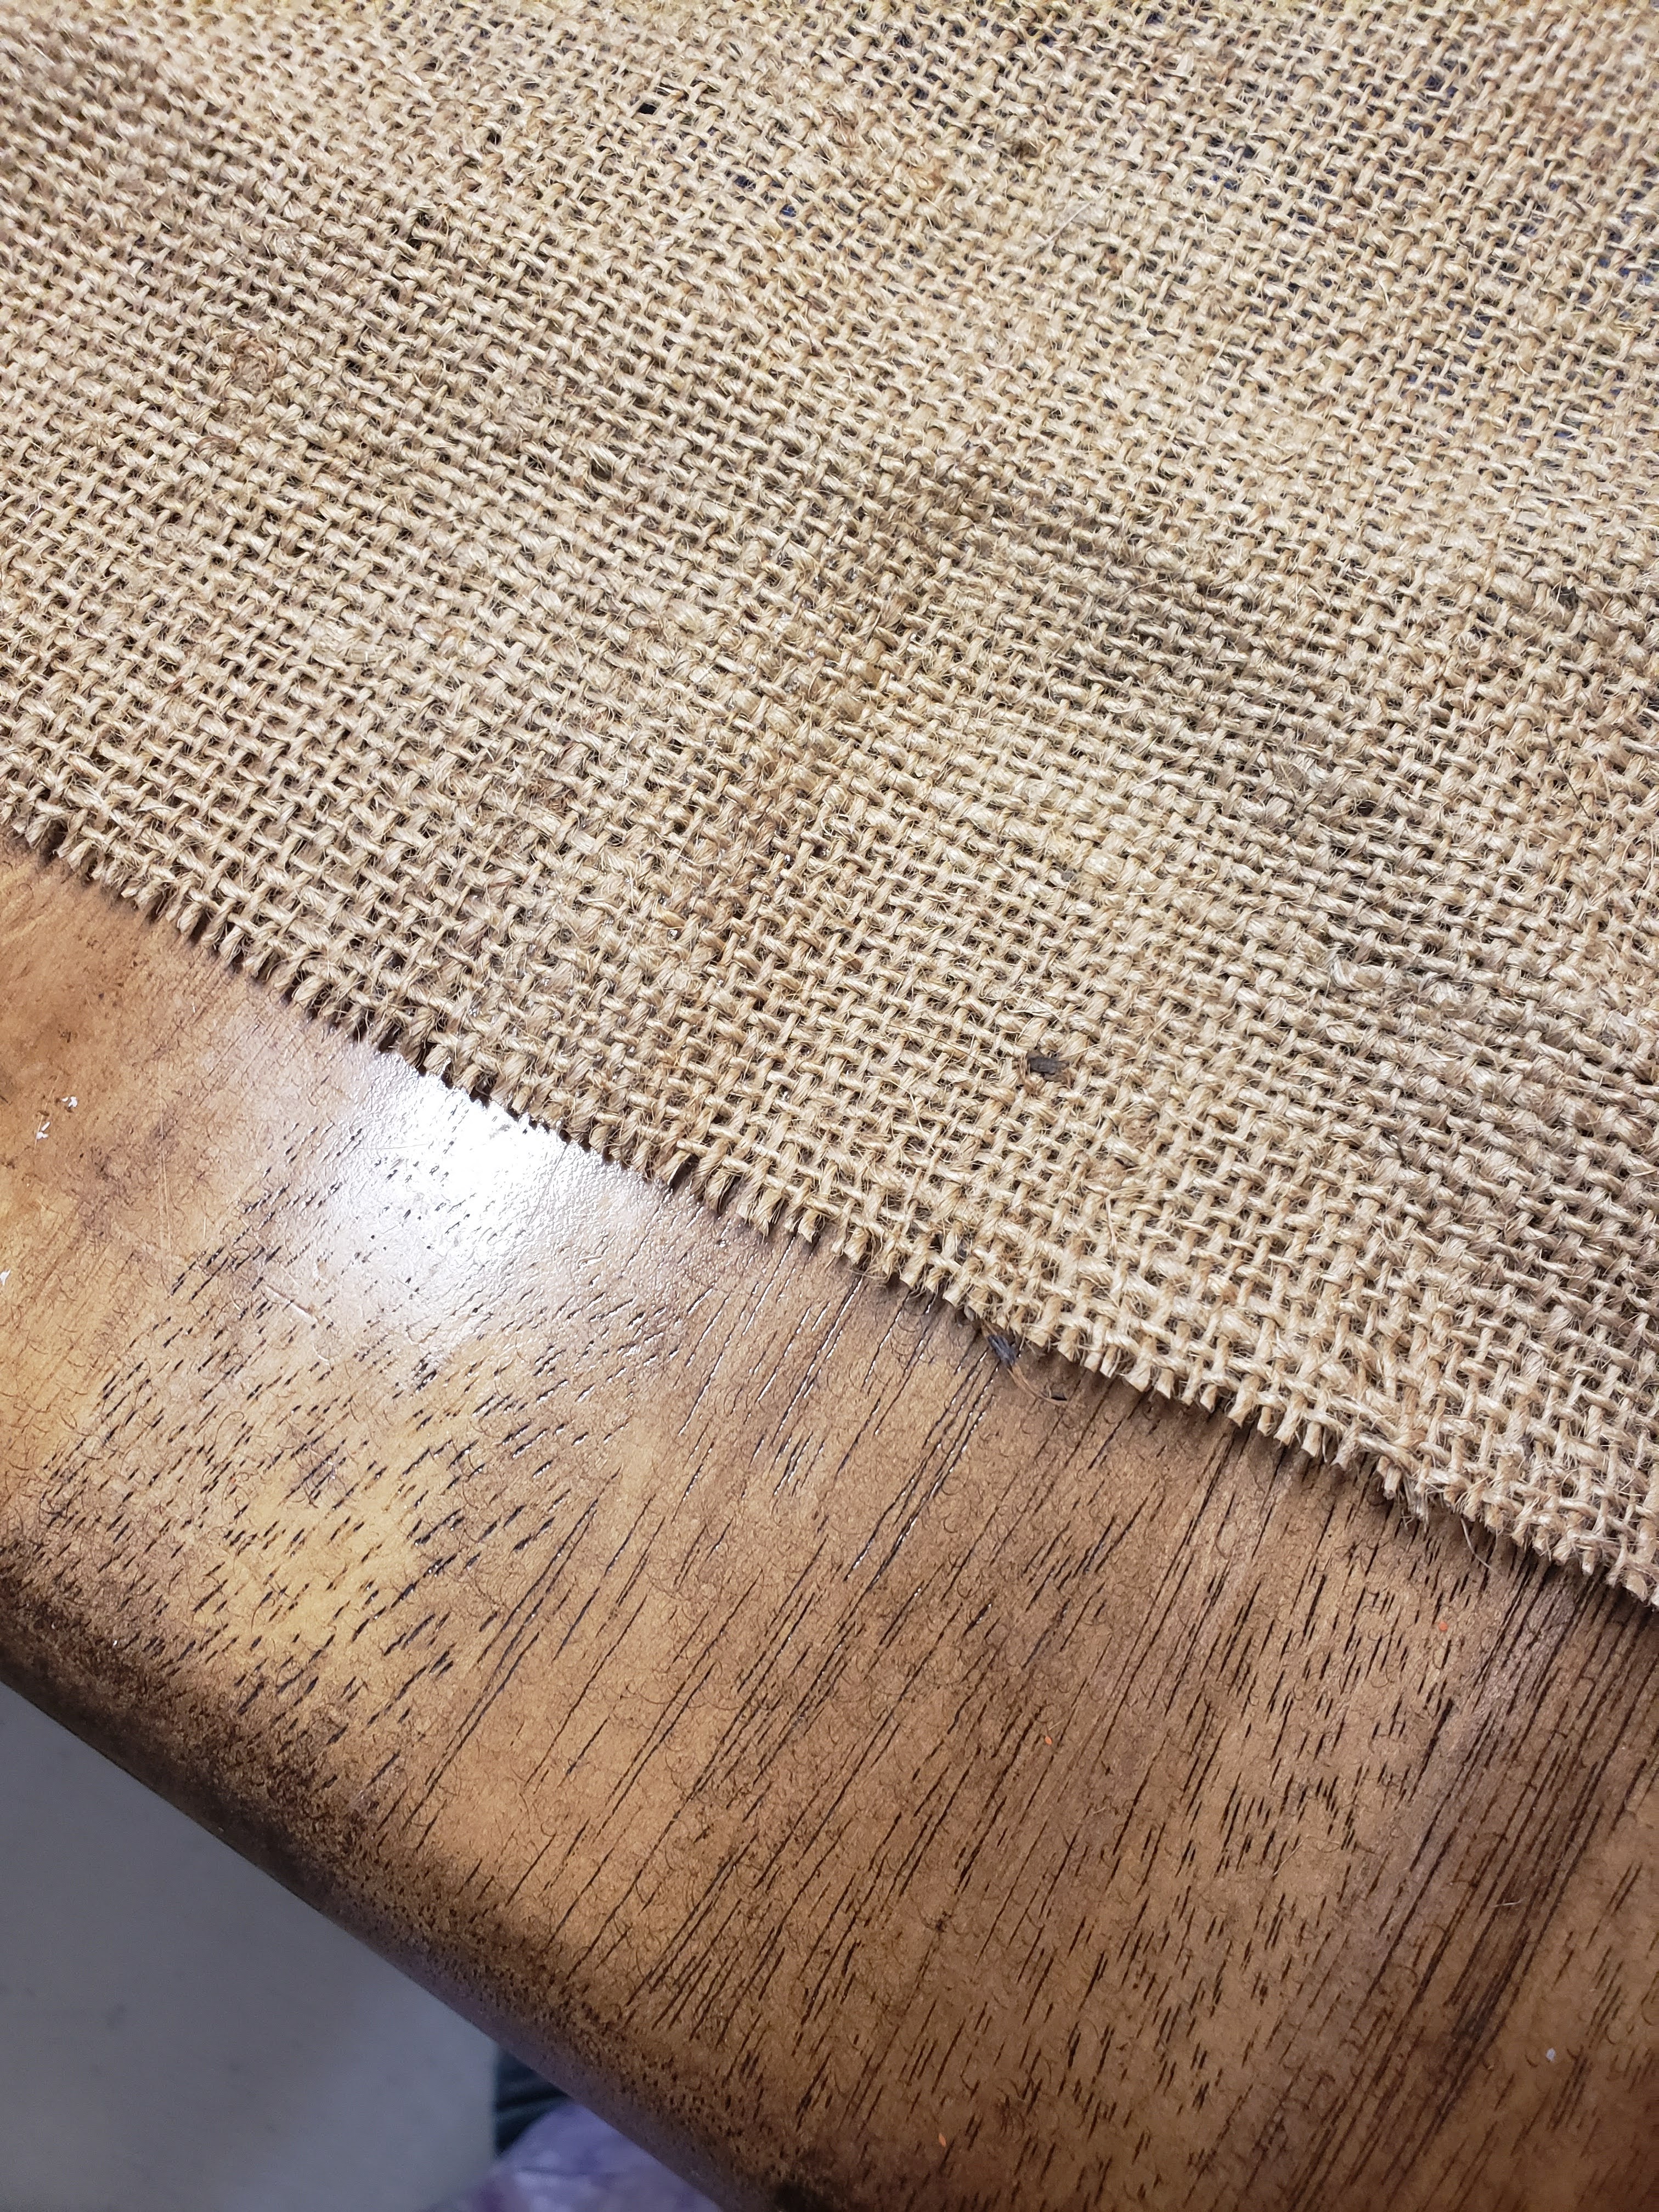
Yes,  that is 5 yards of burlap for $1.00!  Me being me said you can't beat that.  If it doesn't work for your shades you aren't out a bunch of money.  There happened to be two 5 yard rolls so I bought both!  This burlap is like what you would find in a burlap bag or around a root ball of a tree.  It is an open weave.  I wasn't sure this would be the best choice, but I went with it. I saw that Joann's does have burlap for $3.99 a yard.  If you get their coupons you could get up to 50% off.

Let me start by saying this tutorial is how I made mine after reading numerous articles, blogs, and looking at YouTube videos.  I mashed them all together in what I think is pretty straight forward and it went smoothly.

Let's talk burlap.  I did NOT wash mine. Why? Well, after reading, I learned that you actually can wash it, but be prepared for it to shed and clog up your washer and especially your dryer.  It will also shrink and possibly weaken the burlap.  Mine already had some spots that the threads were broken or looped and I didn't want to chance it.  That being said for $1 I'm willing to shake out my shades to get the dust out or beat them with a broom if necessary instead of washing them.  

I was lucky that this burlap did have the selvage edges finished, but as you can see they aren't straight.  This makes it hard to measure accurately. 


Burlap frays as you all know.  I'm going to show you a good way to cut it so that it doesn't look like this when you go to measure and sew.


Let's start with measuring your window.  You will need the height and width.  The window measurement for me is 36" wide and 52" to where I want the shade to fall.  My burlap is 40" wide by 5 yards long. LOL. This took me some time to figure out how much I wanted to add to length for the sleeve for the tension rod and for my bottom hem. This measurement is going to depend on your rod and how you choose to finish the bottom.  I used a super thin tension rod so I added 2 inches to the top for that and then I will be putting a dowel rod in the bottom to add some weight to keep it straight.  For that I added 4 more inches.  So 52" +2" + 4" =58" for my length.  

To get started and have a nice straight line to measure from you will want to pick a cross thread that goes from selvage to selvage.  I have a seam ripper that worked great for that.  I came down an inch or 2 from the top to be sure I had a complete thread.


Now, cut that thread and start pulling it.  You want just that thread to come out.


I pulled on it to bunch it up then I would take my seam ripper and cut it.  It make pulling the thread out a snap


After you pull the entire thread out this is what you should see.  This is you cutting line.  Take your scissors and cut through the open spot.  This is how you not only get a straight line, BUT now it won't unravel.


What a nice looking edge.


Now that you know the top is straight, fold your fabric in half length wise.  We are going to cut our length.  I don't know a lot about sewing, but I do know that when you are cutting a length of fabric measure down the folded edge for your length.  Sometimes the outside selvage edge is distorted and that may measure say 58" that doesn't mean the folded edge will.  I laid mine out on the floor and used my son's tape measure.  I then found the thread nearest to my measurement of 58" and pulled that thread just like I did to start with.  Then of course I cut it.


Making my 2nd shade I found that you will want to press your burlap.  Trust me on this one.  I didn't do this the 1st time and wished I did.  Burlap needs steam!  I happen to have a steam setting on my iron, but you could use a spritzer bottle with water.  You will also need some sort of cloth to go over top of your burlap.  I used a scrap of muslin.  I always have it laying around here as you can see.  Why do you need the muslin Mary?  If you don't you could scorch and discolor your burlap.  I found that out. Now I want you to press not iron back and forth.  By going back and forth you will distort the shape.  So, up and down with your iron until everything is pressed.


This is why I didn't wash my burlap! I'm not worried about these threads as they will be hidden in the side seams. (width) I just trimmed them off.


I will begin with the width seams.  Remember my burlap width is 40" but I only need 36".  I decided to not cut any off the sides and that I would have 2" on each side to work with.  4"/2= 2"  I used my ruler and measured 2" and pinned it.  You could easily pull a thread length wise so you know where to fold your seam just don't cut it. LOL.  I then pressed my seam allowance flat.  You can either do each side separately or get them both ready to sew at once.  I chose to pin both sides at the same time so when I took it to my machine I could knock them both out.


Because I wanted a nice finished looking seam I then folded the seam in on itself and pinned it to measure 1". This is hard for me to explain hopefully the picture shows it better.  Remember to pin it so that you are able to pull the pins out as you sew.


If you don't learn anything else from this tutorial this is by the far the biggest game changer.  If you have a walking foot for your sewing machine use it!  This my friends made this project so easy.  A walking foot helps your burlap go through evenly and not distort your seam.  This was by far the best thing I read before I did this.  If you are a quilter you know about this particular foot.


Ready. Set. Sew.  I chose a 1/2" seam.  You could certainly do less or more.  Because you took your 2" allowance and made it 1" you will not have to worry about catching the fabric that turned under.  Your seam will look fabulous.  Another tip is to use a short stitch length so that all the threads are held in good.


The sides (width) is all done.  You are half way there!


Since I was using a thin tension rod my pocket doesn't need to be very big. I made mine the same size as my sides.  I wish I would have gone at least another 1/2" larger.  My rod fits, barely.  Just so you know these babies are a hot commodity right now.  I went to Big Lots, Walmart, Lowe's, and Joann Fabrics just to find stinking tension rods.  Is everyone at home making curtains? The funniest part about this is I told my son I was going to Big Lots to get them and I'd be home in a bit.  Obviously it took longer than normal.  My son, who is 21, was like I thought you were only going to Big Lots, but I found out you were at Joann's.  I felt like a teenager getting caught. LOL.  He told me an informant text him and told him where I was.  I saw no one that I knew the whole time I was out.  Here one of his friend's girlfriend's works at Joann's and told him. She has only seen me once or twice, but knew it was me. 


Now for the part I would have definitely done different.  The bottom of the shade is one thing I would change.  Like I said before I wanted to see if this could be done "no sew" so I tried some Heat N Bond Ultra.  It comes in a package and can be bought at Hobby Lobby, Michael's, or Joann's.  It is basically a paper backed "glue".  I bought this piece for $.25 at the thrift store.  If it worked I was going to buy more.  


I cut a strip of the bonding agent 1" wide because I figured that is what I made all the other seams by 36" wide.


I then followed the directions that came with it by ironing it on to the burlap.  I will say this.  If you want to use this stuff to keep your edges from fraying and having less bulky seams this will work great, however, you will still have to sew your edge.  I tried to fold this edge over and iron it and it did not stick at all. 


This is NOT what I wanted the bottom to look like, but when you can't turn back you roll with the punches.  What I ended up doing is using the stuff as a fray stopper.  I just folded up the bottom and had a 3" pocket.  I then sewed across it to hold it in place.  Your shade is now complete.


I hung mine from the tension rod inside my windows.  Then on the bottom where we had the extra big pocket I slid a wood dowel rod to give it some weight a structure.  I picked up two 1/2" 36" length dowel rods at Lowe's for $1.79 each. I had my windows open today and the rod kept it from blowing around.  It also keeps the burlap straight and crisp.  See why I said to press the burlap before sewing?  


I hope this helped.  I know I get wordy, but I want to be sure I explain fully.  If you still have questions please ask.


Pin It

Thursday, September 29, 2011

Playing With Wax for Ornies...

Well, I've been wanting to try to play with wax for a long time. I see all these beautiful wax sheep, pumpkins, and angels on different websites and think I'd LOVE some, but being on a tight budget they are not a necessity. So, after visiting a few of my friend's blogs and my BFF Rose making the wax corn for me I decided to give it a try.

I've sort of tried it before using an old coffee can and the double broiler method and got results I wasn't happy with, so I went with the crock pot method this time. Steve happened to have one that he wasn't using so he gave it to me to use. (He's so awesome!) But it seems like every time I go to the Goodwill I see crock pots pretty cheap. I also bought a 3/4 burnt red pillar candle at Goodwill. I've been picking up all kinds of candles at the Goodwill when I see them for this purpose. I threw the pillar OK I put the pillar in to the crock pot wick and all. I turned it on low and nothing happened so I turned it on high and the candle melted great. I also had a ladle I bought at the flea market for $.50. I figured I better not use my everyday ladle. LOL. OH... I wasn't thrilled with the idea of red wax so awhile back I bought some wax tint from Pat Catan's hoping that one day I would try this. I just cut off a little piece and threw it in when the other wax was completely melted. I also put some candle scent in it, but I don't believe I put enough in because well, you can't smell it. LOL. I also pulled the wick out of the melted wax with some tongs and just threw it away.


I also needed some molds. Since I was just having fun I tried 3 different molds. I had plastic, cast iron, and a tiny aluminum cake pan. I got the cake pan and the plastic mold at Goodwill.


I wanted to try this great eagle mold first. This thing is huge!!! It is about 9 1/2 in wide by 3 1/2 inches tall. I sprayed some cooking spray oil in my mold first. Then I used my ladle to pour the wax in the mold. First problem... the plastic distorted and there were places where the wax didn't reach so I put the ball jar lids under each of the edges to level it out. When the wax thickened a bit I put it in the freezer to cool it off. I only left it in the freezer for 10-15 minutes maybe. Just until it was completely set. Pulled it out, twisted the mold a little and out it popped. Now this part is where I need to experiment a little more. I didn't dust the mold with cinnamon before I poured the wax. After I popped it out of the mold I dusted them with cinnamon and rubbed it on. They look great but I'm not sure if the cinnamon will stay on them. I am also going to try to put holes in them today to hang them.


Close up....


After I worked on them I decided to try the cast iron and aluminum. I sprayed the molds just like above then poured the wax. I do not like how my corn turned out. I think I used to much spray because the cinnamon just turns dark and you can't see the kernels. I then tried the cake pan. I didn't fill it all the way up to the top. I poured just enough to to make it about 1/4 to 1/2 inches thick. These popped right out of the pan very easily. I used a paint brush to brush the cinnamon out the eyes, nose, and mouth of the jack o lantern. I actually made two jack o lanterns, one was in the freezer when I took the picture.


All of this came from one pillar candle found at the Goodwill!!! This was a pretty cheap form of entertainment yesterday :) I would still like to try another round of wax things experimenting with different techniques. Don't worry you'll be along for the ride. I'll post another entry when I do. :) I'd like to find some other molds to. I have some old jello molds, but I think I'd like to try molds of things like I see on prim websites. I just need to figure out where to buy them from.

Anyway, as promised I took some pics of my daughters full size quilt top I made. I'd like to finish it soon, but I need to buy the fabric and batting slowly when I have the money.


I'm off today so I have few more things to work on like putting holes in the ornies and sanding and staining a few things I painted yesterday. Hope you have a great rest of the week and weekend. I probably won't be back until Monday since I work all weekend long.

There was question as to what I meant by candle tint. This is what I used.

Pin It

Thursday, September 22, 2011

Rag Ball Tutorial

I just came off of a 24 hour shift and am sitting here drinking my coffee and sweating. Seriously, it's not even 70 degrees outside and I'm sweating. Must be hot flashes since I turned the BIG 37 on Tuesday. LOL. I treated myself to some new fall fashions at the Goodwill for a birthday present. Now I promised myself I would clean out my closet. I got to thinking that some of my clothes in there were bought before my 12 year old was born. I'm thinking it's prolly time to get rid of them. lol. I like to think if it still fits why get rid of it. I really think I'm not seeing the entire picture when I wear them because I do not own a full length mirror. Anyway, I just need to remember that just because they make it in my size doesn't mean I look good in it.

Alright, I know many of you already know how these are done and have already made some. For those of you who have not here's a quick and simple tutorial.

You will need some Styrofoam balls and fabric. These can also be made with fabric only and no Styrofoam balls. Anyway, I had already coffee stained my fabric for other projects. This is great way to use up your scraps. I took my fabric and tore 1/4 to 1/2 inch strips from the fabric.


Now take one of your balls and start wrapping one of your fabric pieces around overlapping as you go. Keep adding strips. When you end and start a new strip make sure you wrap over the loose ends so they don't come undone.


WOW! My pictures really stink on this tutorial... It's a good thing because this was my first one and I didn't do a great job. Yes, you all know I am particular, OK anal if you must, for things to come out right the first time I do things or I won't do it again. Yes I am my own worst critic. Hence I have many started projects that haven't been finished. lol


Anyway, in the end I had different size balls and finished them up. Woohoo!!! another UFO finished up. :) I must really stop drinking so much coffee in the morning when I take pics. LOL.


I've gotten two borders on my daughters quilt with one to go. The top is getting quite large and I have no idea how I'm going to finish it since I've never done one this big before. I think I may just tie it, but who knows. Otherwise, I have no idea what I'm going to do today. It's just me until the kids get home from school. Oh I have lots to do, but I don't know what I want to get into yet. I may play in some wax to see what I can make. This is easy because if it doesn't turn out you just throw it back in and remelt it.
Pin It

Monday, July 18, 2011

Left Handed Cross Stitch Tutorial

Hello everyone!!! Are you ready to hopefully learn to cross stitch? Now before I start I just want to say I am not a professional stitcher and what I may do is not the only way of cross stitching. The way I do it is what I've picked up along the way. My first experience with cross stitch was in 7th grade home ec. Too bad they don't do this anymore. I got a B on my project because I didn't follow directions and used different colors. Isn't that what life is about marching to the beat of a different drum? LOL. Anyway... if you are ready let's get started. If you click on any of the pictures they will enlarge so you can get a better view.

Alright my friends if you are right handed this may or may not work for you. If you'd prefer my friend Kriss of Kountry*Porch*Primitives is doing a right handed version of cross stitching please check her out.

I am posting a free pattern on the right side of my blog for you to stitch along with me. So go over click on it. It will take you to my Picturetrail. Once there right click the picture save it on your computer and then print. Or you can click here. Right click to save and then print. The supply list is here. I tried to get the legend to print on my pattern but no luck. The pattern is in color so you will be able to figure out what colors to use.

This is what our finished project will look like. Just a cute peg rack pillow hanger.


Alright do you have your pattern? Let's take a look at the pattern. At the bottom you would normally see the color legend of what each symbol corresponds with what color. With this pattern the you see color and a symbol. Now in most patterns each small square is one stitch or X. You may also see that there are a little darker lines running vertically and horizontally. Inside of each of these squares is ten small squares for ease of counting. This comes in handy when counting off borders.


For this project I am using 14 count aida cloth in beige. I didn't want to coffee stain it in the end so I choose I darker background. Remember this an 8 inch by 8 inch piece.


There are two ways to get started with any pattern. Sometimes the pattern will tell you to start in a certain place like in the upper left hand corner of the project so many inches from the top of the fabric. I personally always cross stitch from left to right. Lefties you may find this easier because you can see exactly where your stitch needs to go.


OR it won't tell you and you can start wherever you want. Depending on the pattern I will start in the middle on the stitchery for the most part. That way your stitchery is centered in the fabric.

If you are going to start in the middle take your fabric and fold it lengthwise.


Then fold it crosswise...


My pin is in the middle of the fabric or at least close enough. From there you work outward. Don't worry I will be revisiting this step a little later.


For this particular pattern I started with the border. The reason being I wanted to make sure I had told you the right amount of fabric. So I measured 1 inch down from the top and 1 inch from the side and that is where I started. In the end you will have a little fabric to cut off.

Ok in this pattern you will only use 2 strands of thread when you are cross stitching. To start on the border cut off about 18 inches of black floss. Pull two strands away from the six. Some people take one strand at a time then put the two back together to thread the needle. This will make your stitches lay flatter and better. Thread your needle...

Whenever you start you will bring your needle to the front from the back. Leave about a half inch "tail" on the back of the fabric. We do NOT tie knots in the floss. You will just stitch over them to secure the tail.


Now back to the front. This pattern was to little for me to use a hoop so I am just holding it with my hands. Anyway, Your needle was on the front. Being left handed like I say I work lower left to upper right for my first stitch.


On the back... this next stitch from back to front will tack down your tail. The next stitch you take will go in the next hole directly beside to the right where the tail is. Take you needle and push it through to the front.


Your back should now look like this. One stitch over the tail.


This is what the front will look like... the needle came up directly beside the first stitch.


The next step is up to you how you want to proceed. You can either...

A. complete the X and complete each X as you go...


So on and so forth... I find that my X's don't look good when I stitch this way. They aren't even.


OR

B. just keep going until you come to the end of the line. There is no right or wrong way to do it. I prefer to keep going with the same stitch.


So I bet you are wondering how are we going to know how many stitches we've done without recounting them all? Well, every ten stitches I put a pin to keep my place. Remember when I told you that there are ten squares in between the heavier dark lines? Yep this is where they come in handy. And when you have 70 some stitches across I sure as heck don't want to keep recounting. LOL.


Alright my lefties.... since I can't use a hoop I have to hold it in my hand. For me this is the best way to keep the cloth a little taut and hold it at the same time with my right hand.


The top row is done stitching it from left to right. Now turn around and cross the Xs from bottom right to upper left all the way back.


If you are following me this is what the back should look like.


Darn it I'm at the end of my floss. To end it just take your needle back through you stitches to tie it off. Remember no knots!


Wait a minute did I say knot?!? Sheesh I got a knot in my thread. This does happen if every so often you don't let your threaded needle dangle to unwind. Obviously I didn't. These knots for the most part come out pretty easy.


Carefully grab the knot between your thumb and index finger and lightly pull on the knot. Most times they will pull right out. If not you may have to use your needle to get it out or sometimes tie off your thread and cut it off. YEP I've done that a few times. LOL.


I know before I told you when I go across I stitch all the way across. That is true. But when I have stitches that go straight down like a border I will make the complete X then go on to the next one. I still mark every ten stitches with my pins.


I finished all my border. See what I mean you will have a little extra to cut off in the end.


OK now what? The next step is up to you. If you want to count to get your middle or if you want refold (I choose this method) to find the middle of your borders. Fold vertically matching the borders then fold horizontally matching the borders. Mark it with a pin. Now go to your pattern. I printed mine without the center line markings, but yours has it. I use a pencil and draw a line straight down the middle and a straight line across to find my center square.


You all ready to start counting? This can get confusing, but let's try it. I decided I would start with the blue. So looking at your pattern find the blue symbol at the bottom of the pattern. Now if you look up to the figure there is a blue symbol close to our center mark. I always start at the top left of the beginning of a color. So in this case counting from the center going up is two squares. Then counting across to the symbol is two empty squares and on the third square start your stitch. I always count twice and use my needle to mark the square that I need to stitch in by putting the needle in the hole and moving it around a little to make the hole bigger. Again, you can count however you want just be consistent. Ok the first blue circle is done.


Now count either from that circle or the center point until you finish all the circles. I try to base my next circle on the previous circle when I count. Since I already had the blue out I also did the wing.


After the blue I figured the brown should be next. Not much counting around the feathers until you get to the straight parts. And then the head can be counted off the first feather.


Are you still with me???


GREAT!!!! Let's move on to the numbers. I always try to find the shortest way to count. That way I have less of a chance of counting wrong. So, I started at the bottom most feather above the 1 and started there. Once you have the first number count your next stitch from the 1 to the 8 so on and so forth until you finish.


We are almost there... The alphabet is a little more difficult to count. You could either count from the border or count from the bird. I started at the top most plume of the bird head and did the D first. Then I based everything off of that.


Woohoo you made it!!!!


You can finish it however you like. I chose not to coffee stain mine but you certainly could. I cut mine down so that there was 3/4 of an inch all the way around first. Then I cut a piece of blue fabric stitched it together stuffed it with sawdust and made a hanging pillow tuck.

I hope you had fun and maybe learned a little today. If you get stuck please email either me or Kriss and we can talk you through it. :-)
Pin It