Sunday, March 13, 2011

Disappearing 9 Patch Part 2

So where did we leave off with part one??? Oh yes I remember. You should have 10 blocks of nine patches.

Like this...


Now each block of nine is going to get cut in half vertically then horizontally. It should be around 5 inches for your cutting lines. It will look like this. See how the nine patch disappears? It is looking like you spent hours piecing this baby but really it didn't take much time at all.


Now comes the part that is totally up to you. Now that you've cut all 10 of your blocks up it is time to arrange them. Make sure you have a decent space to spread out on and can step back and look at your design. I will warn you this took me a long time. First design... You will notice that you have one complete block of four pieces left over. You can make a small candle mat or small pillow tucks out of those at a later time.


I didn't like it so I tried again...

I started out with four squares as you can see. Yea this took lots and lots of coffee. lol


From there I TRIED to randomly place the rest of the blocks around them. In the end I came up with this. It's kinda hard to tell because my table is skinny so I had to overlap the blocks. I have six blocks across and six blocks down.


Next step is to sew the blocks together in rows. Whether you sew vertically or horizontally it doesn't matter. (Now comes the beginner part of me not making enough quilts yet.lol) As you can see I tried to start matching up the blocks to sew. I thought I would try chain piecing but it didn't work out so well because I walked away from the table and forgot how I had matched up the blocks. DUUUHHHH...

So I had to stop put them back and figure out what I had done. Do NOT do as I do. LOL. It takes more time then necessary. LOL. Figure out a method that works for you.


Once again I made a mistake while sewing the blocks together. I told you I am not ashamed to show you that I'm human and I make mistakes. LOL


I ended up sewing two blocks together at a time. (Again I am a beginner quilter too so I'm sure I'm making more work than necessary.) The next step would be pressing your newly formed blocks. Again find a method that works for you to remember where each block goes after you press it.


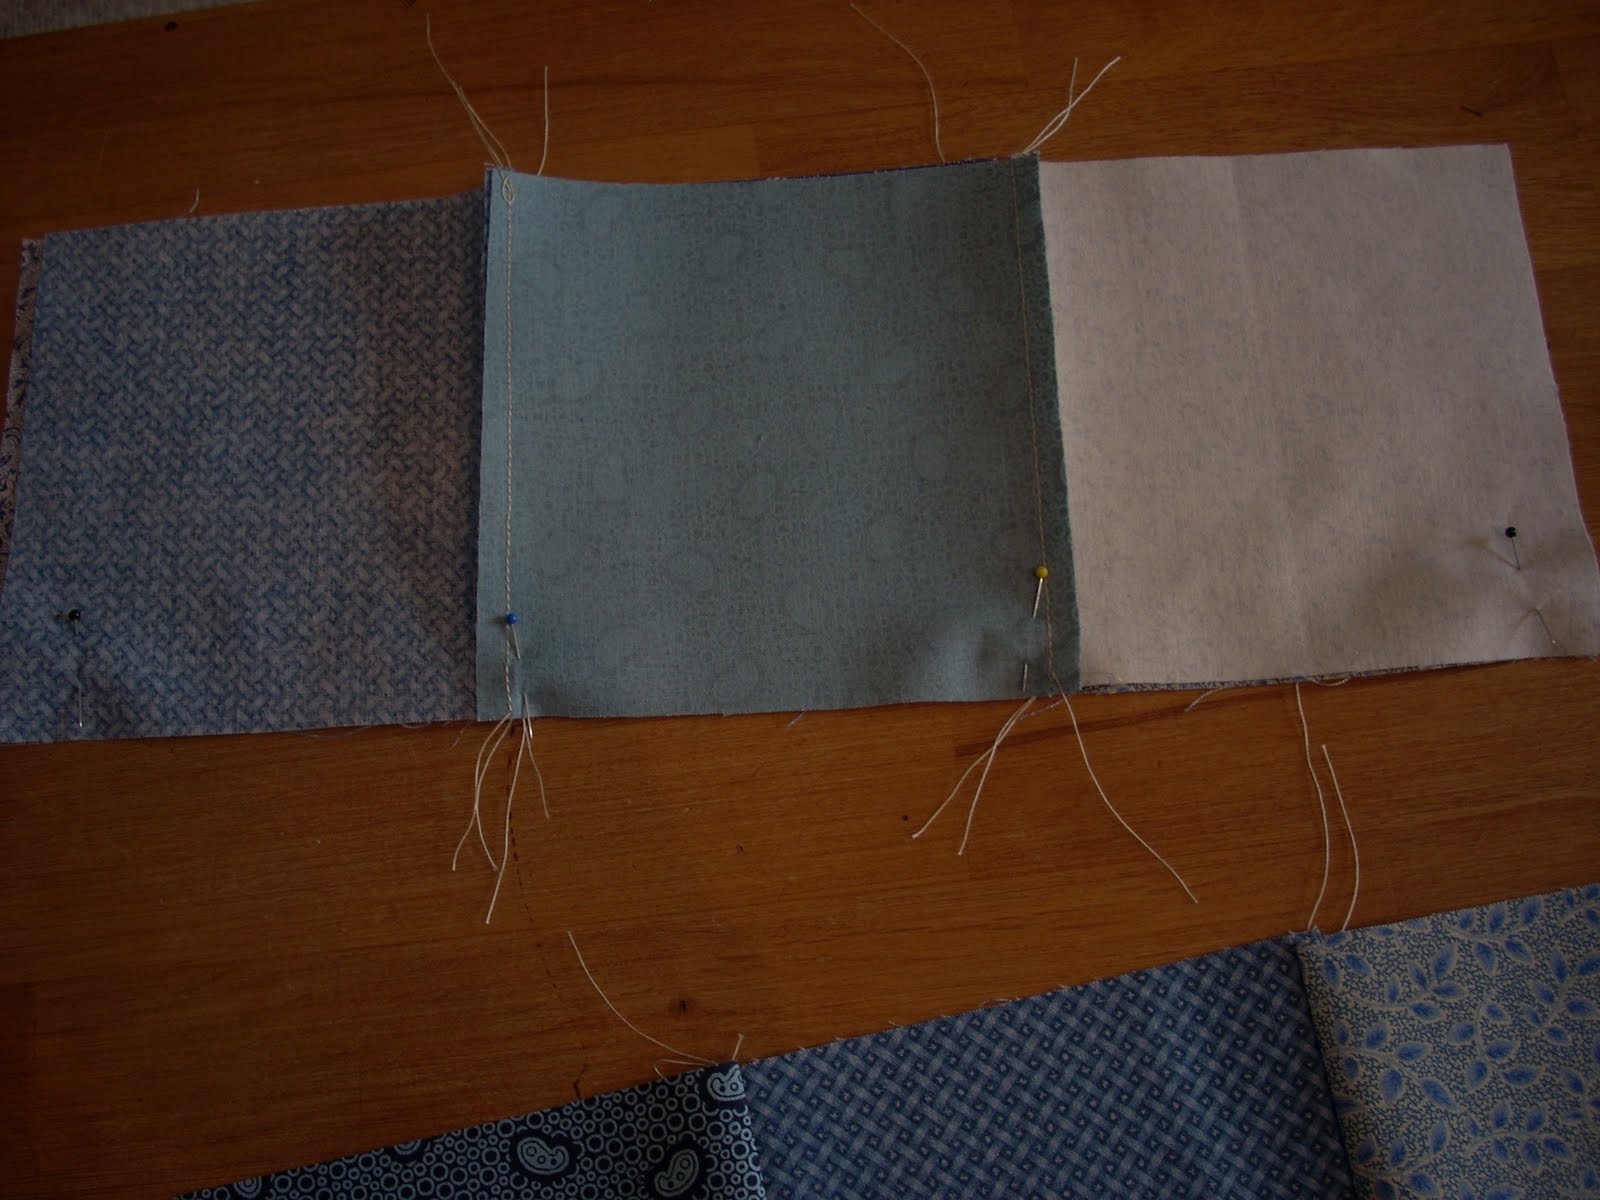
After pressing the blocks I then joined the blocks to the next set of block so on and so forth to make a row. Remember only a 1/4" seam is necessary. FYI you do not need to reverse your stitches whenever you start or stop a seam because you will lock the seam when you sew over it with another row. Remember press your new seams before moving on. I have found out the hard way if you don't press your seams they don't like to match up where they should.


Hang in there... What I did next is sew two rows together trying to match up seams where I could to make two joined rows. I always try to match up any seams in the middle of the rows. I figure people will notice that first if they aren't. As I worked outward some of my seams didn't match too great. Oh well with this quilt it's hard to tell. I have not pressed my seams at this point yet...


Can you guess the next step? LOL. Yep you are right press and sew the rows together to form your quilt top. Tada!!!! LOL


The next part will be deciding how you want to finish your quilt. Do you want borders? Are you just going to leave it as is. Do you want to hand tie it, hand quilt it, or machine quilt it? I am going to be honest right now. I don't know how to machine quilt. This of course would be a quick option. So if any of you who are quilting along (OR on a different quilt you are working on that you are machine quilting) know how to machine quilt and would be willing to post it on your blog I would ask you to let me know and I will link up with you for the next step. I do know how to tie a quilt, but I think I'm going to hand quilt mine. So this is the method I'm going to show you. If you are going to hand tie yours because you know how again let me know. I want to link up with you too. I'd LOVE to show everyone each of the methods used to finish a quilt. Don't worry if you haven't bought your batting or backing yet. I will let you know in my next post of Part 3 how to measure your quilt to add borders, how to measure your quilt for batting and a back, and if you are hand quilting how to mark your quilt. Until next time, if you have any questions please let me know.
Pin It

Friday, March 11, 2011

Spring Decorating in our Home

As promised I have taken more pictures of our humble home. It may be small but it is filled with love and joy. I have added our living quarters on Picture Trail. Please take a look and enjoy...

Please click here to be taken directly to our home pictures.


Pin It

Thursday, March 10, 2011

Some Exciting News...

NO I am not pregnant!!!! NO I am not engaged!!!! NO I didn't win the lottery!!!! Wow I know big disappointments huh? LOL As my nephew would say...


For those of you who are my friend on Facebook already know. I am taking the plunge and opening a booth at the local flea market. Steve is on board (only because I will be selling my stuff and cleaning out my basement and garage.) LOL. No seriously even though he won't admit it he is excited too. It is a small space now, but if I do well I told the lady I may want a bigger booth down the road. Anyway, I stopped into the flea market Tuesday to talk to the lady who runs it. I had talked to her before and she said there was a waiting list to get in. So I only went to ask how long the list was so that I could get prepared. She said actually someone had moved out that morning and that there was a space available. It was meant to be!!! So I jumped on it. Steve and I rounded up a few things and took them in that day. I didn't want to leave it empty!!!! OK I was excited to get some of the furniture out of the basement to make room. So this was the first day... LOL not very organized... but I wanted to get stuff in there. (the crap in the upper right is NOT mine LOL)


Today, we worked on some walls to cover the crap in the next booth. OK we did it so I could hang stuff in my booth like primitive shelves, bowl racks, signs, blanket cranes and other goods Steve comes up with that we will be trying to sell. We also went to the Habitat for Humanity Restore today. First time ever and I am hooked!!!!! I bought a really awesome display cabinet for my tiny booth. Can you tell I'm excited!???!!!! I lay awake at night planning how I want my booth to look. OK OK back to today... Since it was raining AGAIN we decided to paint in Steve's parents garage at one of their rentals. OK you got where we were right? LOL. Anyway... we are taking shape. (I apologize for the pics today they are cell phone pictures) I will keep you up to date on our progress and pictures will be forth coming once I get some idea of an organized booth.


This is how our little neck of the woods is looking as of today. This is not a pond you are looking at. It is a field next to the garage where we were. And as I type we are suppose to get snow tonight and tomorrow and rain again Saturday!!!! UGH I am so tired of seeing water coming from the sky.


Today I also took the opportunity to take pictures of my living room since I rearranged on Tuesday. I am in the process of organizing them and hope to post them tomorrow sometime here on the blog. So stay tuned tomorrow. Since I am running on 2 1/2 hours of sleep since I worked yesterday I am going to get off and go to bed. One last thing I will be posting the second step on our quilt project on Sunday so if you are quilting along please check back. Alright I just reread what I typed and it is really scatter brained, SOOOOOOO seriously I am done. No more to read. Go to the next blog. No really I mean it. Bye. See ya. LOLOLOLOLOLOL I am slap happy tonight. Good night everyone.
Pin It

Tuesday, March 8, 2011

Furniture added to Gettysburg Mercantile

I have decided it is time to part with some of my treasures. I do not have room for all of my furniture in my tiny space. So now you get the chance to own some. Furniture will be PICKUP ONLY unless you live near me in Orrville Ohio then we might be able to work something out. Check out my selling blog for more information.

Click here to visit the Mercantile.


Just the coffee table. LOL.


I have not been up to too much except trying to stay ahead on my quilt so that I can get out the part in a timely manner. Thanks for all the emails from those who would like to participate! I know this is short and sweet but I have a few things to get caught up on. I have a picture frame to paint and a few other redos I may work on today. Have a great day!
Pin It

Sunday, March 6, 2011

PictureTrail Update...

Just a quick note that I finally got caught up with my Picture Trail. I will add more Spring pictures as I take them. But just in case you missed Christmas here at the Homestead I also updated that do. Have a great weekend!!!


Just click here...


If you are having a hard time posting a comment please email me and tell me what it is saying. I have checked my settings and posted a comment and it worked fine. Thanks!!!!
Pin It

Friday, March 4, 2011

Disappearing 9 Patch Quilt Part #1

Before we get started let me say I am not a great quilter. I don't claim to be and have not been doing this very long, so bare with me. I will share with you how I will be making this quick easy quilt. Also, I will be breaking it down into parts so that if you want to quilt along you can take your time and not have to hurry. I will try to post a part once a week for as long as it takes. :) PLEASE if I am not clear or if you are a skilled quilter and want to add an easier way please post on here or I will link up to you on your blog OR I will get one of those linky things for all of you to link if you want to post your progress.

For this project I am using 5 inch squares. I learned that if you buy a charm pack of fabric that it normally contains 30-40 coordinating fabrics of a certain line that a company makes. If you want to start small you can certainly use one charm pack or cut your own squares. I want a lap size quilt so I am using 80 precut squares I bought on Ebay a few years back. YEAH YEAH I know... HOARDER... For this project I needed to cut 10 more squares from, get this, the fabric I just bought from Goodwill. YEAH really I'm cutting it. LOL. I've decided on blues for the theme.


This is the fabric I added...


I'm not sure how this is going to work, but we are going to give it a try... I think it may work better with more selection and colors. Oh well, you know me I post things that don't always turn out how I want.

First thing I did is lay out my fabric into blocks of nine squares. I am anal OK OCD when it comes to pattern and design. I have a hard time just putting blocks wherever. They have to have a pattern to me. But for those of you who can just put em down and leave them go ahead. I worked on mine for a few hours because I kept messing up the pattern I had going. (shaking my head) Seriously this shouldn't take that long. LOL. I made 10 blocks of 9 patches each.


Close up...


Alright ready to move on? Next step is to sew together each block of 9 patches. Always use a 1/4 inch seam allowance. I know on my machine that the line beside my presser foot is the 1/4 inch mark.


I, personally, sew my blocks together by rows across. Three blocks in each row. Yes, it uses more thread that way, but for me it works.


I then take that row to the ironing board and press the seams and blocks. The seams should be pressed to one side. You can see in the picture they are pressed to the outside. The row underneath should be pressed in the opposite direction, both edges pressed inward, so that the seam allowances aren't big and bulky. Pin two rows together as shown and stitch them together. Try very hard to line up your seams. Then add the third row.


It should look like this in the end.


I think this is a great stopping point. I hope my directions are clear. If they aren't please feel free to post here or email me. I'm sure you aren't the only one with that question. Good luck and have fun. I can't wait to see your creations. If you are sewing along and don't have a blog or even if you do please email me your pictures. I'd LOVE to post them on here for everyone to see!!!!
Pin It

Wednesday, March 2, 2011

Spring In the Dining Room

I see that you are back. Thank you for returning. As promised I told you I would share my dining room with you. If you'll remember way back at the beginning of the year I decided to reorganize and go with function. For the most part it has stayed the same. I know how can you improve MY dining room. LOL. Well, since I ummm acquired some more fabric I had to move things around a little. I should not be saying this, but my favorite quilt shop was flooded on Monday but that is another story. My friend Stacie told me they are selling their fabric at a discount. So what does that mean? Wellllll, I uh might need to go. LOL. Then I'll surely need to really reorganize. OK dream time is over back to my dining room.

So let's revisit the dining room... I can't get a good pic looking into the dining room until tonight because there is too much sun coming in the window. I will post it tonight around 8 hopefully.


UPDATE: I started this post this morning and decided since it was a beautiful day Steve and I went to Amish Country. AND yes I stopped at a fabric outlet...AND yes I bought fabric... AND it was CHEAP!!!! hehehehehe I'm so excited because I bought some awesome fabric to make things for you my faithful customers. Then I bought a Judy Condon book that I didn't have. Then of course we had to make a loop up to my favorite quilt shop that I mentioned above. There flood loss was my gain!!!! $4.00 a yard!!!!! woohoo normally double that a yard or more. I bought some dark browns for the pink and brown quilt I want to make. Speaking of quilt... I will be starting my tutorial on the disappearing 9 patch this weekend. So keep an eye out.

Thanks again for coming back to the homestead. Hope you enjoyed your tour so far. P.S. the living room is next... I'll let you know when I make progress on that. LOL
Pin It