Thursday, February 16, 2012

Projects

OK let's try this again.  I already had half of my post typed then I somehow stupidly deleted it. grrrr... This better not be any indication of how the rest of my day will go.  So let's try this again.

I told you the other day that I was working on some new projects.  I only completed one of them, but the other two aren't far behind.  This first project are some painted boxes I finished.  I can't tell you how long I've had these paper mache boxes.  I just thought about something.  This counts toward finishing another UFO. Woohoo!!!  Anyway, I just couldn't decide how I wanted to do them.  Well, after looking at Pinterest (I'm so addicted) I got some ideas.  So here's my first projects...  I have an issue with that top box's lid.  It doesn't want to flatten out.  I need to deal with that yet.


My unfinished projects.

My next project that I worked on while the above one was drying was this one.  I took a piece of scrap linen like material and coffee/paint stained it.  Then I used one of my new stencils from Folk Art From the Harbor. This one was actually a three step stencil, but I only used two.  I'm thinking I'm going to put this in a frame, but then I've also considered making a pillow out of it.  I just can't decide.  This right here is why I have so many UFO's.  I get to a point where I don't know how I want to finish it and set it aside.  grrrr...  I'm so addicted to redware and yellow ware can you tell? lol


Third project I stitched yesterday while at work.  This here I have a ton of ideas for.  I'd like to make a drum pinkeep, but I can't find directions on how to cut the circles for each end.  I'm guessing it's the width of the roll plus 1/4" allowance??? I'm still thinking on that one.  Of course then I thought what about a needle roll/kit, or a pillow tuck, or..... see what I mean I can't make a decision to save my life. lol  I'm also deciding if I need a border around it.  sheesh!!!!


This last picture is for Margie of Hungry Hook Primitives.   She posted a  picture of her old/new chandelier she redid.  She asked if I would post a picture of mine because I told her I had done the same thing.  Many of you will remember how ugly and shiny gold this once was.  Then Steve roughed it up and re sprayed painted it.  I just LOVE it!!!  The flowers below are ones Steve bought me for Valentine's Day.


I have a few things I have to do this morning, but I'm hoping to work on the two projects and maybe get them finished up.  I hope you have a great day!!!
Pin It

Tuesday, February 14, 2012

Hey Columbus OH Area Friends!!!

Yeah, you :-)  Steve and I along with some other prim friends Carmen read her post about it are coming to the Columbus area to SHOP!!!!  I have heard there are some fabulous stores in your area, so Steve so kindly agreed to take me down on Saturday Feb. 18th.  I will be getting off of a 24 hour shift, but I promise I will try not to be grumpy :-)  If you'd like to meet up with all of us click on Carmen's name above to read the post and to get a hold of her.  She is setting everything up.  Hope to see some of you there!!!!

In other news...

I told you I'd show you my redo's.  So, I thought I'd share today.

My first project was my grater light.  I just LOVE it!!!!  I bought the grater at the thrift store, had Steve cut a block of wood to shove up from the bottom.  Then I had him drill out a circle in the block of wood.  I already had the light so I shoved it up in the hole and there you go.  This light was one of those single bulb and has a clip type thing at the bottom so the light won't fall out. See that I used some of my fake redware on my pegs? The two of them in the middle are actual reproduction ones from Ragon House.


OK Since we are on the above picture want to see what I used for my textile racks???


The top thing is a yarn winder... I believe not really sure.  Bought at the thrift store awhile back and couldn't figure out how to use it.  The thing below I'm not sure what it is, but it's wood and I thought either a handle for a tool or a yoke of some sorts.  Bought that at the flea market.

And the other side... excuse the wrinkles lol  Did you know you can buy fabric that looks like coverlets??? That's what the blue piece is :-)


This my friends came off of an Amish buggy.  It's the piece right behind the horse I think.  I know I've seen them on there some where. lol.  Anyway, another flea market find.


And this... the wood box FREEEEEEE trash find!!!!  I had to wash it out and man oh man did I get the worst splinter from this thing!!! But I LOVE it!!!!!  hehe see my new year round tree on the right?  I'm waiting on some lights to arrive then I'm going to decorate it.  Steve couldn't wait he grabbed a couple ornaments and asked if he could put them on the tree.  He looked a bit disappointed when I told him no.


I'm working on taking more pictures of my Spring decorating, but I have some empty "props" I need to fill first and right now I'm not sure what I want to use yet.  It may have to wait til this weekend in case I find some goodies!!!  I'm working on a couple projects today, so maybe I'll be able to show you Thursday.  Yep, I work tomorrow so no post.  But until then have a wonderful day.
Pin It

Sunday, February 12, 2012

Sneak Peak Spring 2012

Here's a sneak peak :-)  ENJOY!!!!!!


Pin It

Friday, February 10, 2012

Rearranging and a WARNING

In my last post I was talking about rearranging in order to have some furniture for the booth to display.  So, after I got home from work yesterday morning  I jumped in and started rearranging.  I now have two pieces to take to the booth.  I'm unsure if I want to sell them quite yet, but at least I can use them until I do get something to sell. 

I was trying to find a before picture, but I guess I didn't take any for my winter decorating. :/

After:  I want Steve to build me a footstool for my chair still.  See the brown in the bottom left corner.  That's the new couch that I haven't showed you yet.  Steve bought it because he said he was tired of looking at mine and it was starting to sag really bad.  It was bittersweet taking my baby to the Goodwill.  After all I had it for probably close to 10 years or more.


I took my candles out of the window because... see the spot in the middle of the carpet???  Yeah, my candle fell out of the window while we were gone and burnt a spot in the carpet.  So this is a WARNING!!!! Thank goodness it was a low wattage bulb!!!!


I just saw my son's Ipod AND the paddle lol.  No, I don't use this on my kids.  It used to be my son's Dad's paddle when he was younger and I just haven't given it back yet.  I laid it there to remember to give it to my son when he goes to his Dad's.  Oh and of course the newest trend for your prim decor... a goldfish.


I'm thinking the jars won't be staying here.  I have another idea already.  I LOVE my new candle in a jar in the upper right of the picture.  I will show you the inspiration for it.  I already had the candle shelf, but I bought the glass cylinder at the flea market for $.75. 


Inspiration... The Workshop of David T. Smith gorgeous pictures!!!!!  

I just LOVE their candle holder hanging on the peg rack AND of course the whole kitchen!!!


Pieces going to the booth... the black cupboard... again not sure if I'm ready to part with it.  I may be able to if Steve will build me something like it only with a tombstone cut out for the top.


And the green bookshelf...  I need to fix a few things on it though first because I forgot to "prim" up one of the legs on it. lol


Today I have a few more things to redecorate in the living room then I need to start on the dining room since I took the red corner cupboard out.  I also have a bare space on my wall in the living, since I moved that green bookshelf.  It is crying out for something to be put on it.  I'm also contemplating taking down the gameboards and doing something else there too.  Still thinking on that one.  Steve suggested moving my stitcheries to that part of the wall. 

I already have a plan for the dining room I think.  This room is going to take quite a bit of time because I have all my winter greenery piled on the dining table from the living room.  I need Steve to get down my totes off of a shelf in the garage so I can put them away.  I've decided to put up a year round German twig tree in my dining room where my corner cupboard was.  Ok, at least for now I'm going too, lol.  I have a wonderful idea if I can pull it off.  We'll see because it would entail me crafting some ornies and such.  Hopefully after today I will be able to show you my other redo Steve helped me with because I'm putting it in the dining room .  I'll try to post it this weekend.  Have a great day and see you soon :-)


Pin It

Monday, February 6, 2012

Some Redo's

In my last post I told you that I was working on a new paint technique.  I LOVE how it turned out, but the process is long.  I'm hoping I will be able to hang it going up my stairs, but I have a bad feeling it hangs too low.  If not, I may have to hang it in my hallway.  Anyway, this is how it turned out.

Before: thrift store find...


After: 3 layers of paint later


close up:


A different view:


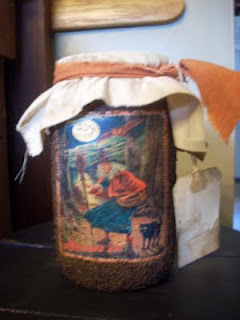
I made these grungy jars awhile back and decided I wanted to be able to use them year round.  So added a little pizazz lol

Before:


After: plus I added another jar I found.


I have started painting a set of star boxes I had in my stash.  Hopefully I will be able to finish those up this week.  Today, I wanted to get some cleaning done that I have been neglecting because I'd rather craft.  So, I have cleaned my kitchen top to bottom, vacuumed, dusted, and laundry.  I have started to pull out some Spring items, but I need to finish putting away winter things this weekend.  I know I'm rushing it a little, but with these beautiful sunny days I just can't help it. 

Do you ever have one of those nights that you just can't sleep because you have a ton of ideas or things running through your head?  I have been like this for the last two nights.  The reason being is we have sold quite a few of our bigger furniture pieces at the booth and are running out of display space.  So, I have been thinking about what else I have that I might be able to put down there for display.  This may mean A. I need to find something else to sell from my collection, B. put one of my pieces down there with a NFS tag, or C. have Steve throw something together.  I think I've come up with a plan, but it will mean a furniture move in my home, which then means move my collections around a little.  I need to figure it out so that I can take something to the booth on Thursday as the person who bought my TV stand will be coming soon to get it out of layaway.  UGGGHHH what to do, what to do... With Steve working full time he doesn't have a lot of time to build things, so if I ask him to do it I need to have a picture drawn with measurements ready to go.  Grrrrr.... see what I mean I just go back and forth back and forth. lol.

Have a wonderful next few days.  I'll be back soon :-) I have another redo ready to show you then.


Pin It

Saturday, February 4, 2012

Primitive Painting/Distressing 101

There are many resources on the web these days on techniques used to paint/distress wood items.  I'm going to show you how I/we distress our wood items.  It is basically the same as most of the other how to's, but for those who may be new to prim painting here you go.

I'm starting out small.  Whenever I try something new I start with a small project.  So let's start out with your every day unfinished wood spoons.  I go to the Dollar Store, Family, Dollar, you know what I'm talking about and buy a package maybe 6 at a time for under $3.00.

I had a few in my booth that weren't selling so I brought them home.  Now, when I took them to my booth I had stained them only.  This is the first step of the process.  I don't stain everything first, but I think the if you do the end result is much better.  You can certainly not stain them and they'll be just fine.


This is the only stain I use... the key word is GEL!!!!  It works so much better than the real liquidy kind.  It isn't as messy and a little goes a long way.


Next step is paint.  I just pour a little acrylic paint (the kind in the squeeze bottle) on to a paper plate and get busy painting.  I use acrylic on small projects, but use regular latex on big projects.  If you'll notice I use a really cheap shower curtain under all my painting projects.  It's large enough to hold a big project but can be folded for small ones.  I only painted it with one coat of paint.


This is the other one.  This mustard is sooooo bright. EEEKKKK  I bought it awhile back and I figure I better use it up. lol


Wait for your paint to dry completely.  Then get fine grit sandpaper and lightly sand the spoon.  Lightly because you just want some of the paint to sand off if you stained your piece first.  If you didn't stain it first sand it until you can see the natural color of the spoon  underneath in different places.


All sanded...


Next step is re-staining.  I always use rubber gloves when I stain.  Wood stain does not come off of your hands with soap and water.  I always save all of my holey socks or lone socks for staining purposes.  I don't like using paper towels because they fall apart.


Take a small section of your sock and dip it in the stain.  You don't need a lot.  Rub the stain all over the spoon.  If you think you have too much in one area no problem.  Just re-rub over the spot either with the stained section or use a clean section of the sock.  This stain will seal in the color.  I do not polyurethane my items unless they need to be wiped down occasionally.


The final step is optional.  I like to use a a furniture wax as the final coat on my items.  It basically just gives them a soft smooth finish.  You can find it at most hardware or home improvement stores.


Make sure the stain is completely dry.  Then take another sock and rub it in the paste then on your spoon.  Let it dry and you are finished.   So here they are all finished. :-)


I am currently working on another project that will have multiple layers of paint on.  It's a new technique to me to we'll see how it goes.  I have another paint and burn technique tutorial too.  So, if you have mastered this process check this one out too.  Paint and Burn Method.
Pin It

Thursday, February 2, 2012

Added To My List

I haven't been very motivated yet this week.  This is my long work week and it's hard to do anything.  So, normally I just do quick things.  Things that will add to my ever growing UFO (unfinished object) pile.  This is no exception.  I bought this quilt awhile ago at the thrift store for a really good price.  I don't remember how much just a couple bucks I'm sure, but if it wasn't a good deal I wouldn't buy it. lol.

This is the before:  I LOVED that it was hand quilted but, I have always hated the finished edge since I got it because it didn't look or feel right.  These pics were taken with my cell phone because I took it to work with me to do.  Anyway I could never tell if it was suppose to be a binding or border.  I just knew it was puffy and looked weird.


So I decided to take a peek.  I started to rip out the seams. What the heck???? Who does this???


Of course now I have to take it all off. Again who finishes a quilt like this!?!?!?! Really a rolled up piece of batting.


I had to unroll it to see of course.


So now all I have left is the center hand quilted part.  I'm still debating if I should use the red I tore off to make binding, or if I should go with a different color.  I can't add a border at this point so into the UFO pile it goes. lol.  I'll get to it someday.


I also did a little bit more crafting. 

You all know I'm not a heart kind of girl, but I made these out of thrift store little girl velour dresses.  I saw on Pinterest (which by the way I'm addicted to lol) someone made strawberries out of velvet.  So, I LOVED the idea and ran straight to the thrift store in search of velvet and came up short.  I thought maybe this would work instead.

Before:


After:


The red pillow was already made and laying in my UFO pile, so I decided to make something.


I got a few other things at the thrift store...

I LOVE geraniums!  There is a full pot, but you can't see it since my desk top sinks down in.


Some Spring flowers...


A basket to use in my craft room for my strips of fabric.


I got a few other odds and ends, but nothing worth showing lol. 

I have a day off today, so I will go out to the garage and find something wood to paint for my tutorial.  So, keep checking back this weekend for a tutorial.  Have a great day :-)


Pin It