
You all know I LOVE doing tutorials for you. I have always tried to make and decorate with things I've made. Most times it is out of necessity to save money. Other times I just like to see if I am able to do it. So, if I can help you on your creative journey I am all for it.
This tutorial is based off of a few I found online with my own twist. So, let me introduce you to Clyde my assistant for today. This guy is my fiance's pup. He comes to visit on the weekends since Bill and I don't live together. Well, he isn't exactly a pup because he is 5 1/2 years old. Ignore my door panel flipped up in the background. I have to open those so the dogs can lay in the sun during the day.

Supplies:
Red wool (mine is recycled felted wool that was a blazer I found at the Goodwill)
Green Wool
Needle and thread (I'm using black so you can see it)
A round plate or lid
A marker
Scissors
A little bit of poly fil for stuffing


Let's get started...

Start by tracing around your plate or whatever you are using. This happens to be a dessert plate and makes larger strawberries. The smaller the lid or plate the smaller the strawberry.

Next, cut out your circle on the line. Many tutorials tell you to use half a circle, but I prefer to section it off into thirds. They don't have to be perfect. You can tell I had to redraw mine. No worries because the marker will be on the inside of the strawberry.
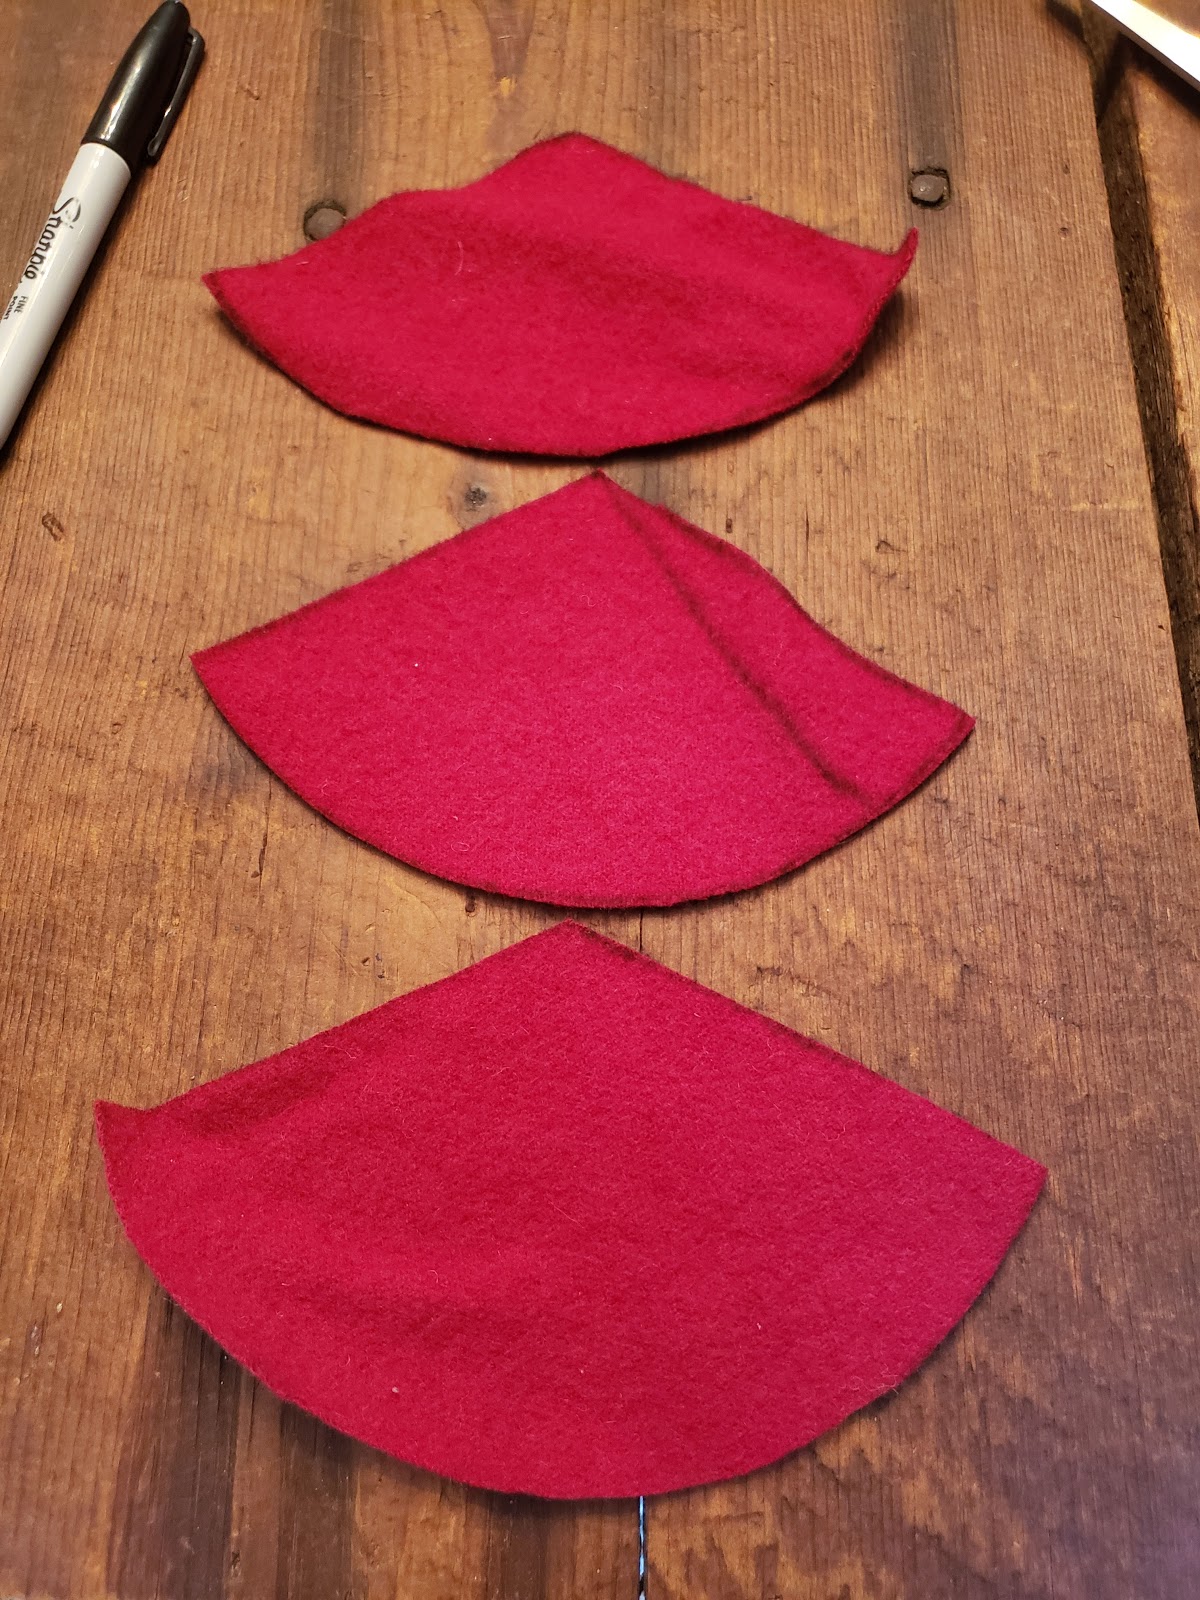
Cut your circle into thirds.

Take one of your pieces and fold it so that the cut edges also has your black marker match up. All marker lines should be showing. This is the inside of the strawberry. Take about a yard or so of thread and starting at what will be the bottom point of your strawberry hand stitch a running stitch up the edge. I like to keep them kind of small stitches so they don't pop open when I'm stuffing it.

Without cutting your thread do a running stitch all the way around the top of the strawberry. This is actually the curved part of your circle. Do NOT cut your thread. Turn your strawberry right side out and stuff it. Not too full because you don't want your stitches to pop open.

I like to hold it like an ice cream cone to stuff it.

You should still have your thread tail. Pull on the thread to draw up the edges to close off the top. Make sure you hold tension on it or it will pop back open.


Re thread your needle and stitch the top closed while holding tension to keep it closed.

For your leaves you have a choice. You can hand cut your own so each one turns out different or you can be OCD like me and make a pattern. I found that I can't cut one freehand to save my life. I had to make a pattern or 3. LOL. For this one I use the top pattern. I made that by taking a quarter and drawing around it. I made sure the quarter covered the top stitching of my strawberry. Then I drew my leaves. Of course I drew it on leftover cereal box cardboard because it is easy to cut.

Obviously you will need to cut your leaf out of your green wool. The next step of pinning your leaf to the top is optional. I like doing it so it doesn't shift while stitching it on. I did use green thread to stitch it on so you can't see it very well. Basically take your thread and whip stitch the edge to the strawberry if you want the leaves tacked down. I have made a couple where the leaves stick up and go wherever by not whip stitching the edge.


You can sort of see in this picture how I stitched the leaf on to have willy nilly leaves. Just stitch the top in a "snowflake/start" pattern. Basically all you want is to cover where you pulled the strawberry together.

If you want seeds then there are several ways you can do it. If you can make french knots then use embroidery floss and do that. If you suck at it like me I settle for a needle and thread. You can use gold, black, white or whatever thread you want. I used black. Basically you take small stitches here and there to resemble seeds. I like to give them a light tug to make it "dimple".

Continue doing this all the way around the strawberry until it is covered. Knot your thread and pat yourself on the back. You now have a strawberry.


I personally like the newest one I made because of the leaf color. The others were made of a dark/teal color I had when I was experimenting with these. The next ones I make I want to make out of osnaburg fabric and trying painting them with paint and coffee stain to look more primitive. I can't guarantee it will be this weekend because it suppose to be 60 degrees tomorrow. Woohoo!
Those are adorable! I like the way you do the seeds. Thank you.
ReplyDeleteYou are welcome.
DeleteThanks GF for the tutorial! I love your strawberries and might actually give these a whirl...sometime LOL. I actually like doing French knots so it might be fun....that or little seed beads would probably be neat too. Smiles & Hugs ~ Robin
ReplyDeleteYou are quite welcome. I made a huge strawberry pinkeep years ago and used seed beads and it was so cute, but it took forever! lol. These small ones would be a different story.
DeleteGreat tutorial. I love making strawberries. I have made them from f=different fabrics and wool. Janice
ReplyDelete